This post lists the steps on how to set up an Instagram Shop to help drive traffic and sales from your Instagram feed to your online store.

Instagram just made it a whole lot easier for their 1 billion users to shop directly from posts and stories with the latest app update.
As I am writing this in 2020, Instagram has made a major change to its layout by adding a shopping button to the bottom bar of the app (replacing the“heart” notification). The shop button leads users to Instagram's Shop page, allowing people to purchase from virtual stores and discovering new brands, all at their fingertips.
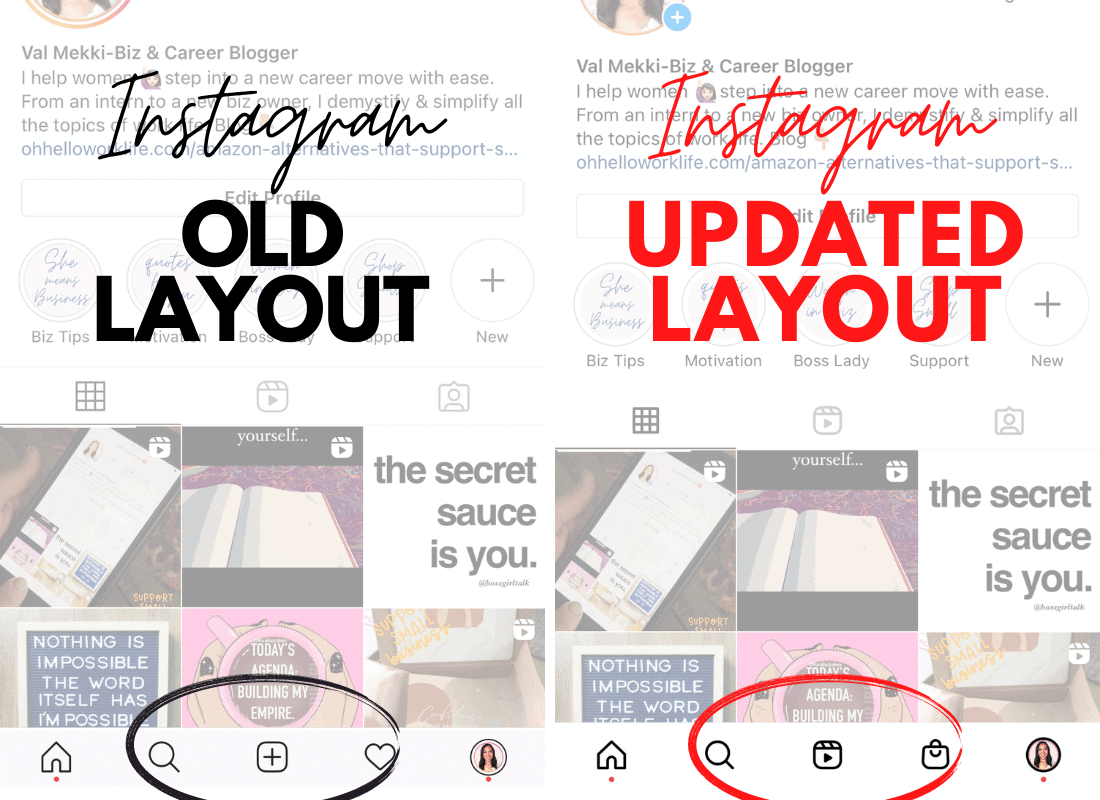
If you run a small business and haven't yet added the shopping feature to your Instagram or Facebook account, then you are seriously missing out on potential sales and high engagement with your followers!
Here is a step by step guide on how to set up your Instagram shop for your side hustle, online store, or brick & mortar store.
This Post Includes :
What is Instagram Shop?
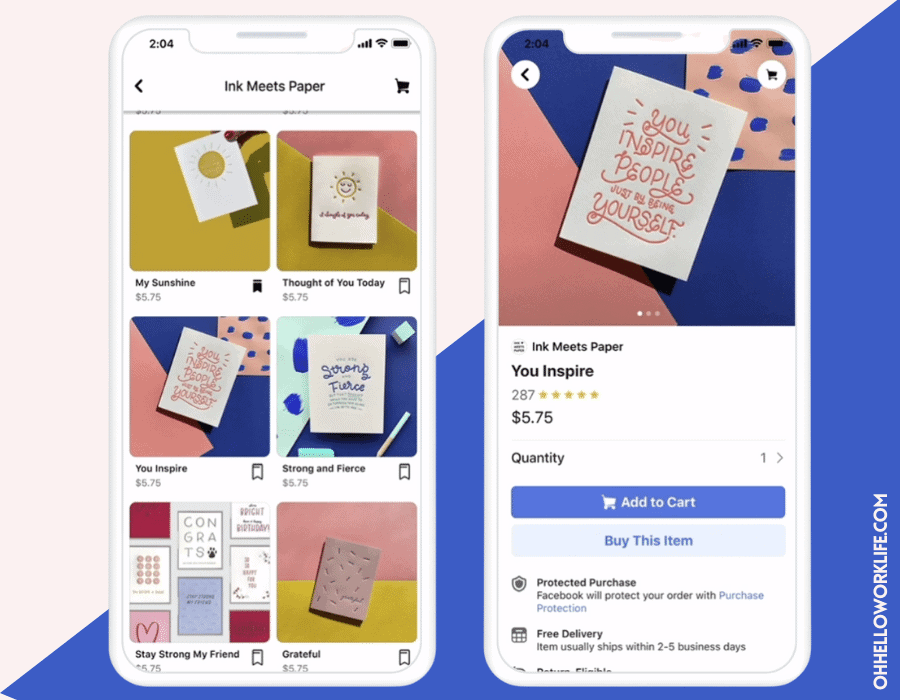
What is Instagram Shop? I am not talking about paying for an ad with a link for purchasing. An Instagram shop allows people to shop your product assortment, tag an item on a post or on stories, the tags lead the user to add items to a cart, like, or save.
Why businesses need Instagram Shopping
Why should you create an Instagram Shop? Rewind to the first part of the post- 1 billion Instagram users! Instagram has taken the user experience from "liking" pictures to buying products directly from posts.
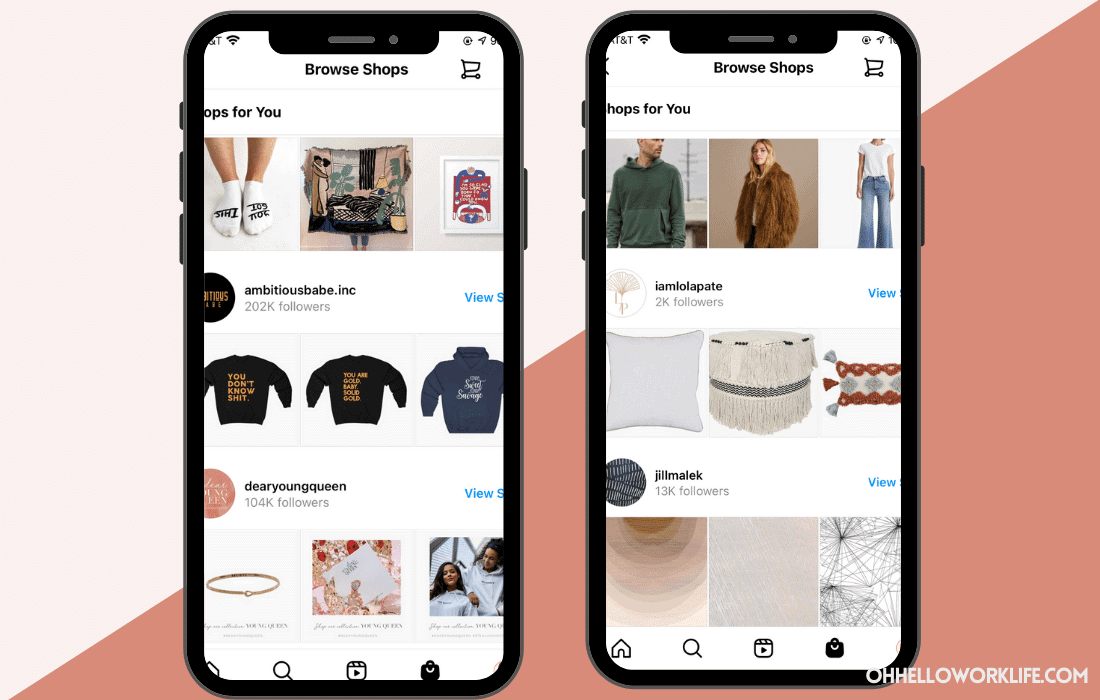
According to Instagram, 500 Million users visit the Explore page once a month. The Instagram user's behavior is shifting to more discovery, which is awesome exposure for small businesses.There is also a Explore Shops page for people to browse new brands and products that do not show up on their regular feed. But you have to set up an Instagram Shop for your business to have a chance of being discovered and to tag product images.
So let's give your side hustle, online store, or brick & mortar store more exposure to new customers and a whole new sales funnel!
Here is the step by step guide on how to set up your Instagram shop.
Step 1: Meeting Instagram's Requirements and Eligibility
Before you get started setting up for an Instagram Shop, you must check-off the following:
- Is your shop in a supported market? There are select countries that are not yet supported with Instagram shop. Full list here.
- Are the items you are selling a physical product? Instagram is only supporting physical products at this time, but services and digital products will probably be added. (I will keep this post updated)
- Will you comply with the merchant agreement and commerce policies?
- If your business owns a website, you will be asked to validate the website where your product is sold from.
- Is your Instagram account a business account? This is a must! If your account is personal, you will need to change it to business. Super simple to switch a personal account to business.
- Is your Instagram account connected to a Facebook business page? This is a must. A Facebook page must be linked to an Instagram business account. Here is a helpful article on how to set up or change a Facebook page connected to an Instagram business account.
Once you have answered check-off all the above requirements you can now move onto the next step!
Step 2: Sign Up with Facebook Business Manager
You will need to sign-up for a Facebook Business Manager account to upload a product catalog and to set up a Facebook Shop.
What is a product catalog? It's a detailed list of products that you plan to sell on Facebook or Instagram. The list includes images and information that will be published on the site.
To start an Instagram Shop, you need to set up a Facebook Shop. All of the product information syncs from Facebook to Instagram. I know it sounds kind of confusing right? But remember, Facebook owns Instagram. Their business tools are connected. But hey- bonus! The steps you are taking sets up a shop across Facebook and Instagram.
Step 3: Sign Up with Facebook Commerce Manager
Facebook Commerce Manager is the platform where you can manage your product catalog, set up business information, decide where you want your customers to check-out and how items will be shipped.
Start here.
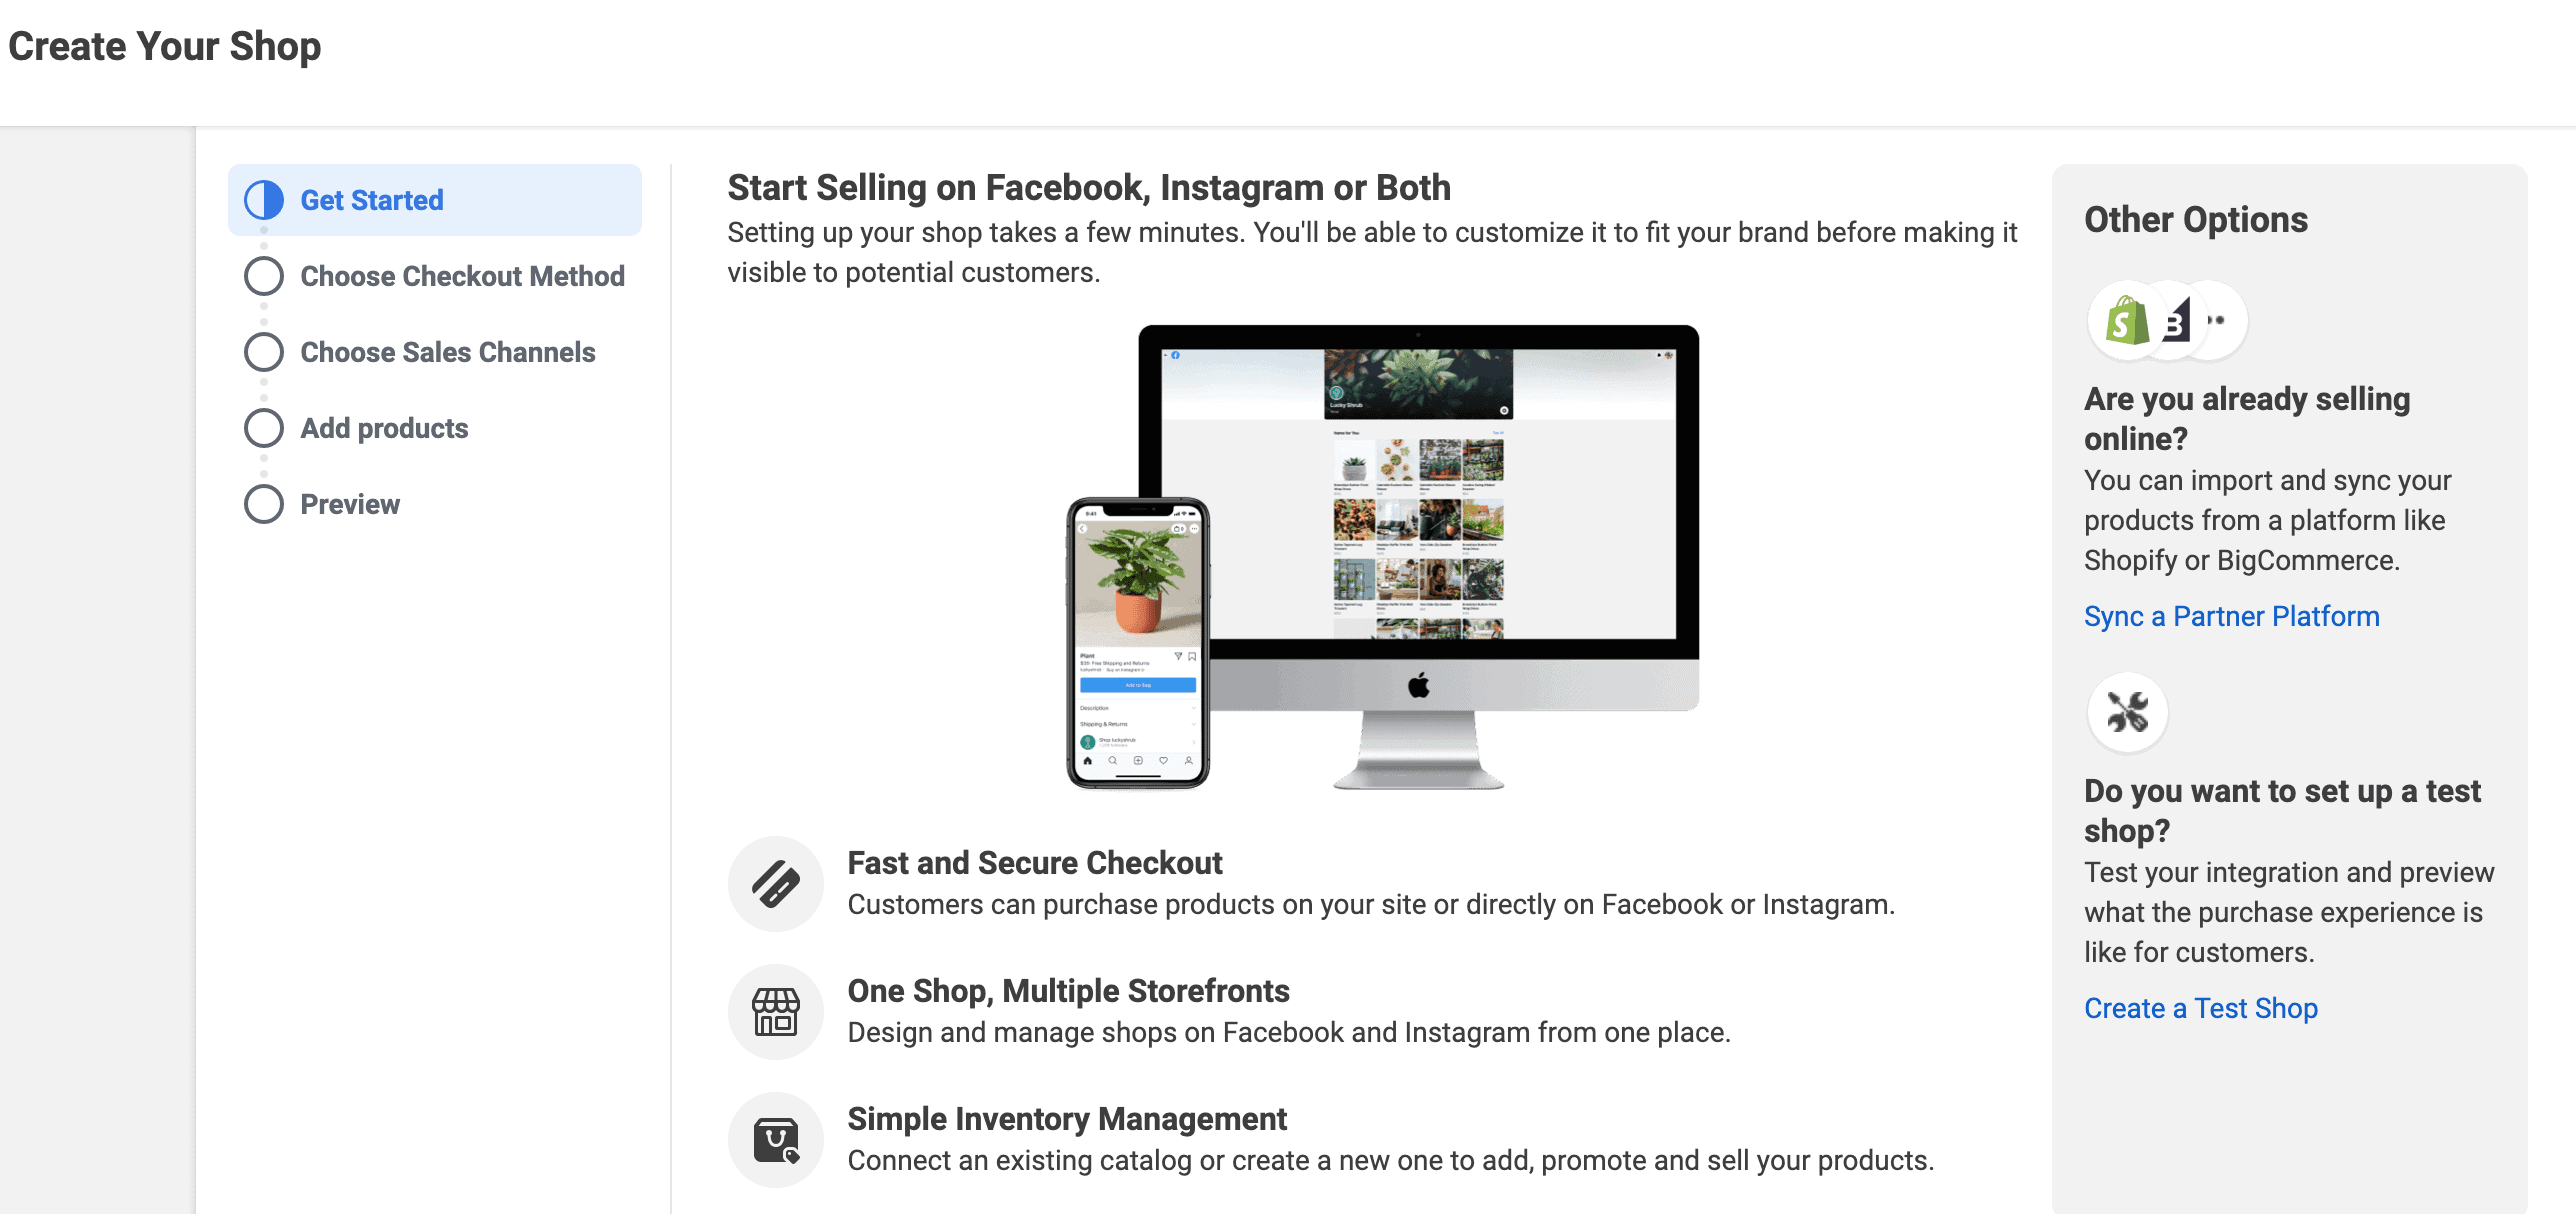
Choose a check-out method, there are two options:
- Check-out from your website (Best option if you already own an e-commerce website).
- Check-out directly from Facebook or Instagram (a seamless transaction for the user to select the product and directly order through posts). * Note: there is a small sales fee for every transaction with check out directly from Facebook or Instagram.
Step 4: Upload A Product Catalog
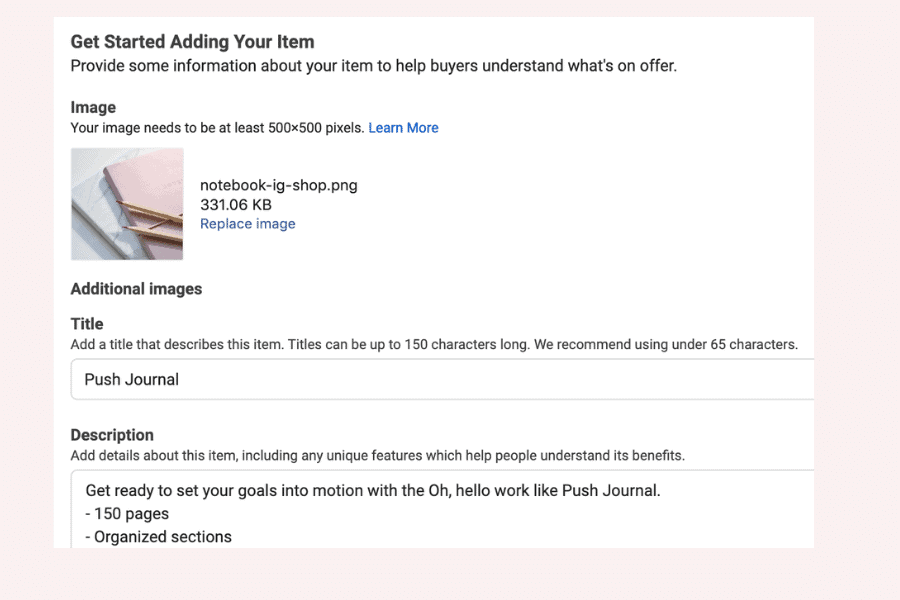
There are 3 ways to upload a product catalog:
- Option #1- Manually upload product information is when you manually enter all of your product information and images directly on the Commerce Manager platform.
- Option #2- If you have an Etsy Shop or own a website on a platform that is not is in partnership with Facebook, you can upload your product listing through a data feed. However, it is recommended to only use a data feed method if you have 50 items or more. But syncing a feed not only uploads the product information, but can be a way to automated your inventory information on Facebook.
- Option #3- Integration from one of the selected eCommerce platform like Shopify or BigCommerce. Full list here. To sync up the product list to Commerce Manager.
Pro Tip: Interested in learning more about owning your own website to sell online? Check out Shopify. If you are serious about selling your product, I am a big believer in owning your own website. And using social media platforms as an additional sales funnel.
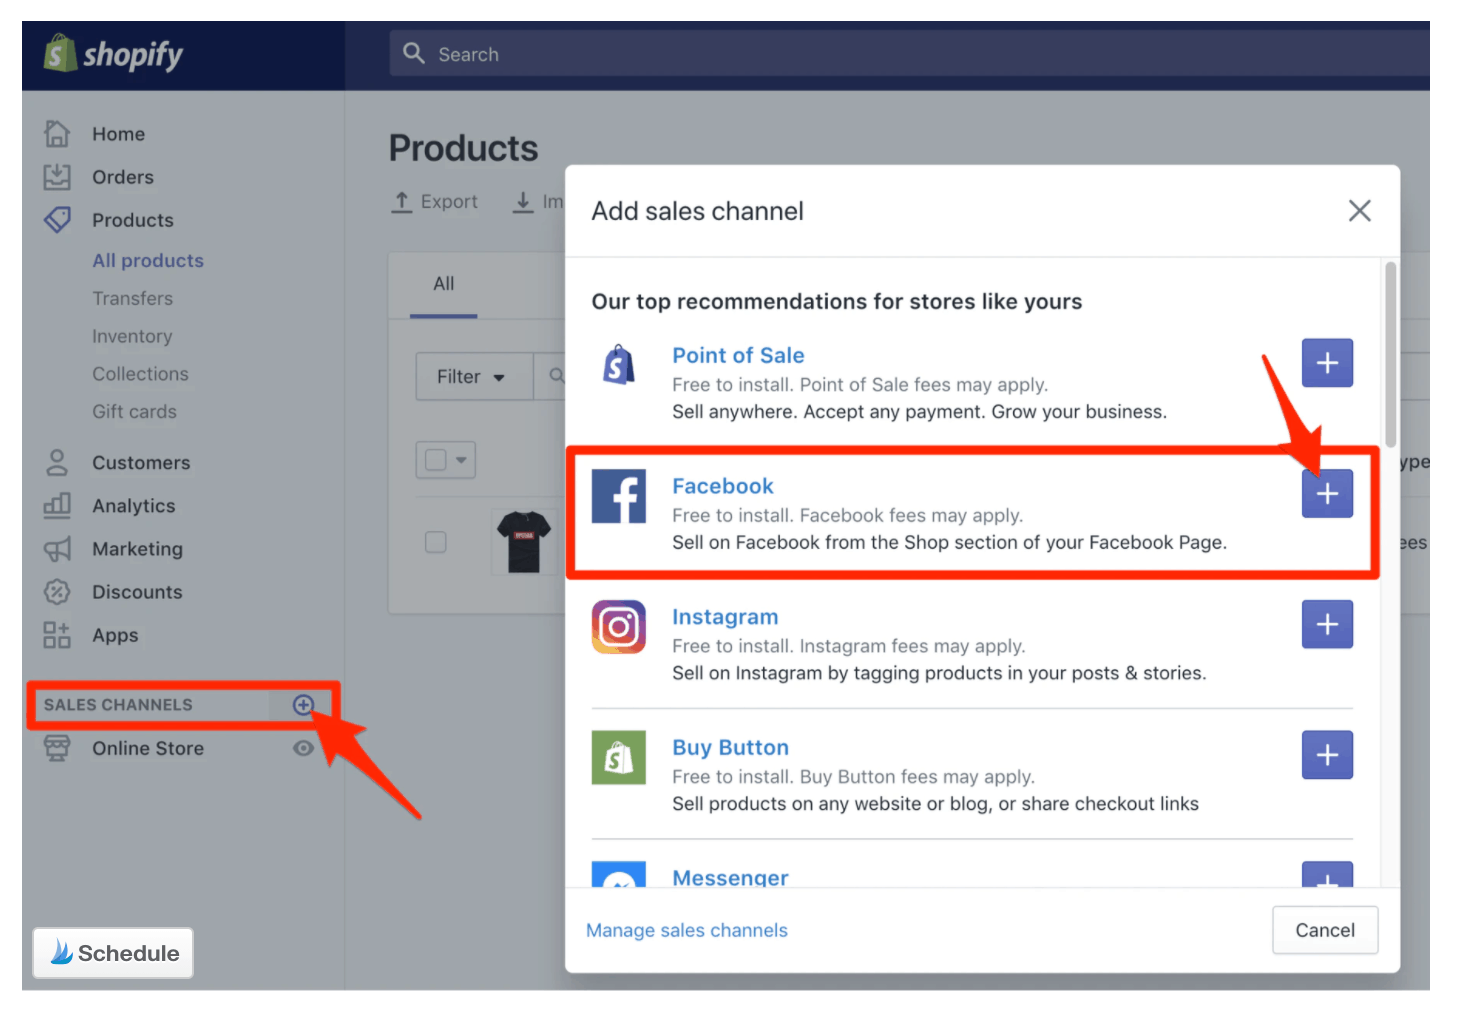
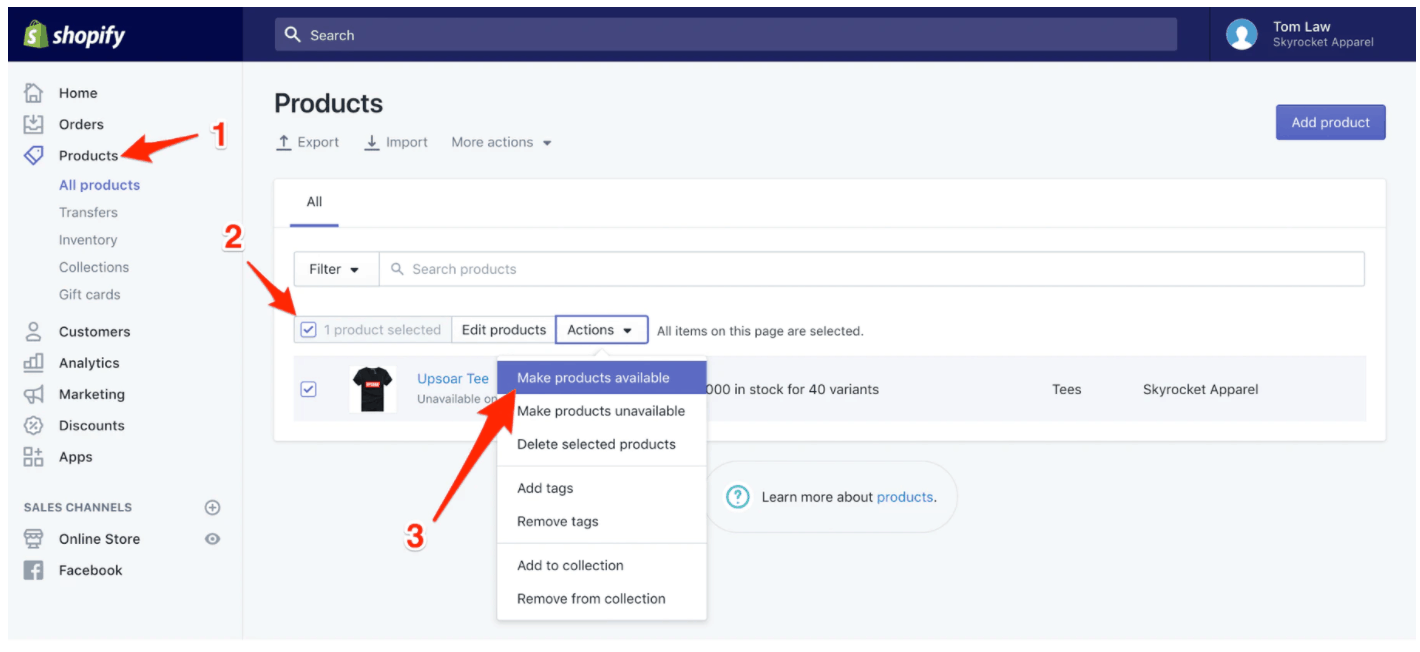
Examples of Option # 3- Here are pictures of what the integration would look like with a third party e-commerce platform, like Shopify.
- In your Shopify Dashboard, click “Sales Channels,” and then click the plus icon to add Facebook as a new sales channel.
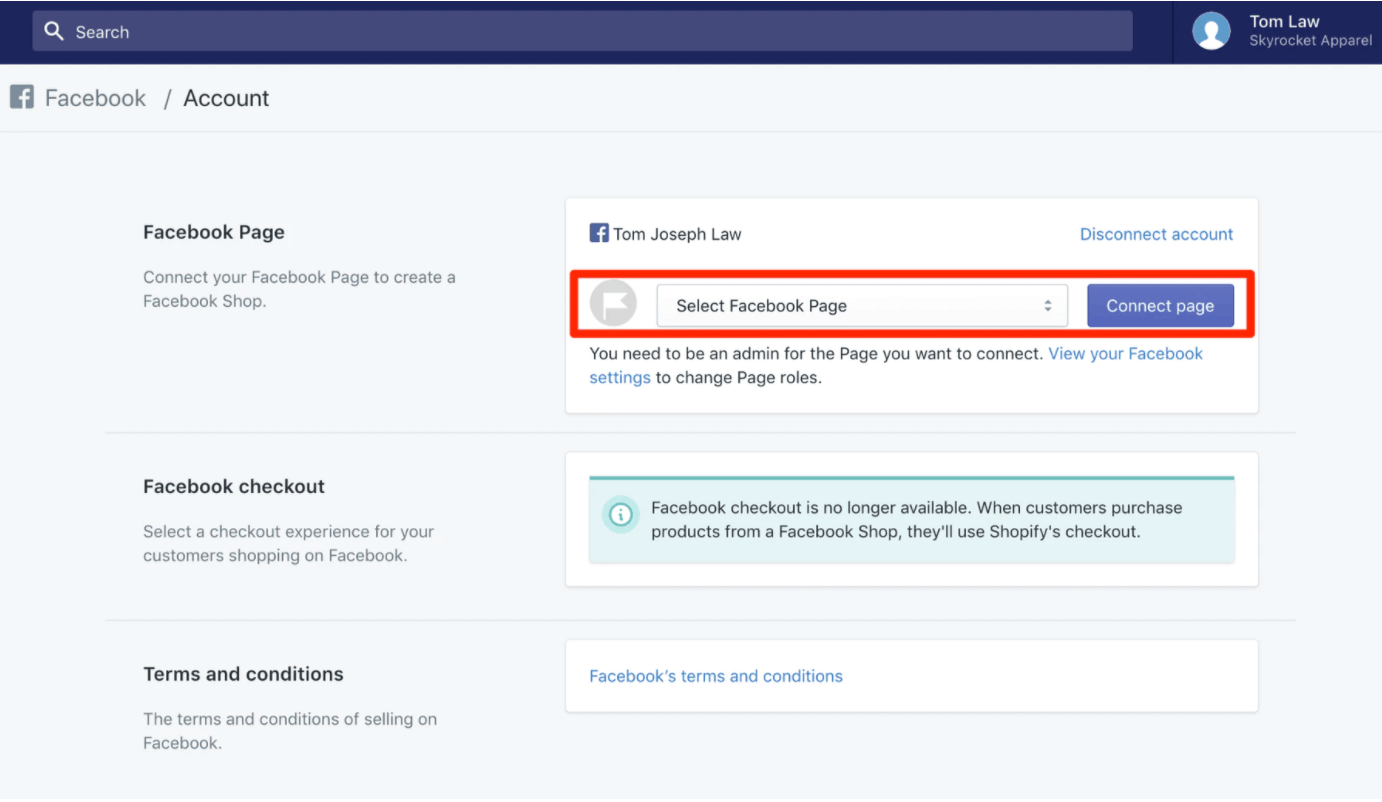
- Select the Facebook Page Connected to your business (see below).
Facebook will review your Shopify account and could take up to 48 hours of approval to connect the listing.
Once approved, you will select which products from your Shopify dashboard, that you want to make available for your Facebook Product Catalog. Pretty simple to add another sales funnel!
Step 5: Submit Account for Review
Once you have set up your product catalog it’s now time to submit your account for review.
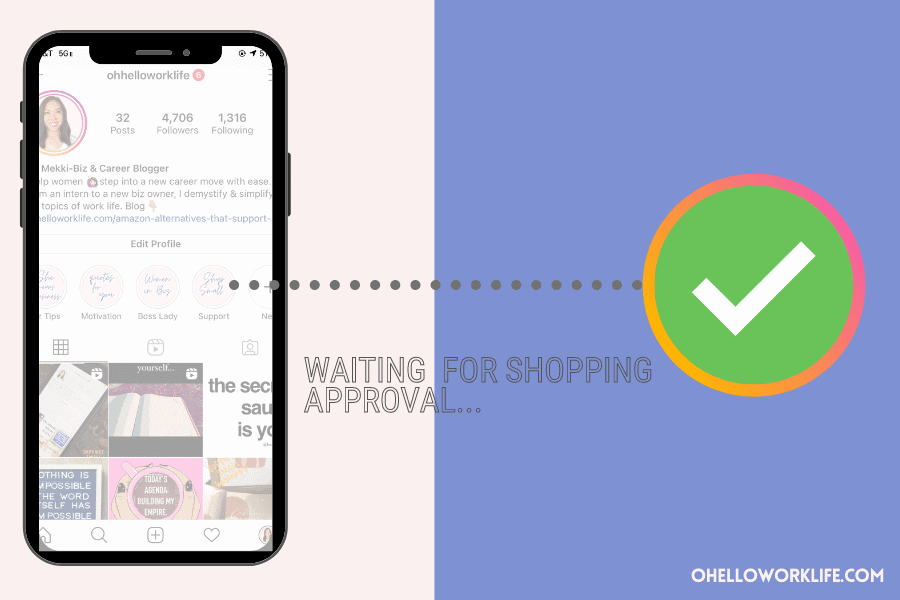
Here are the steps to submit for review:
- Go to your Business Instagram Profile and tap the three horizontal bars
- Select Settings
- Follow the steps to submit for review
- Check back after 48 hours to check your status
Step 6: Turn on Shopping in Settings
Once approved (Yay!) Shopping will appear under your account settings.
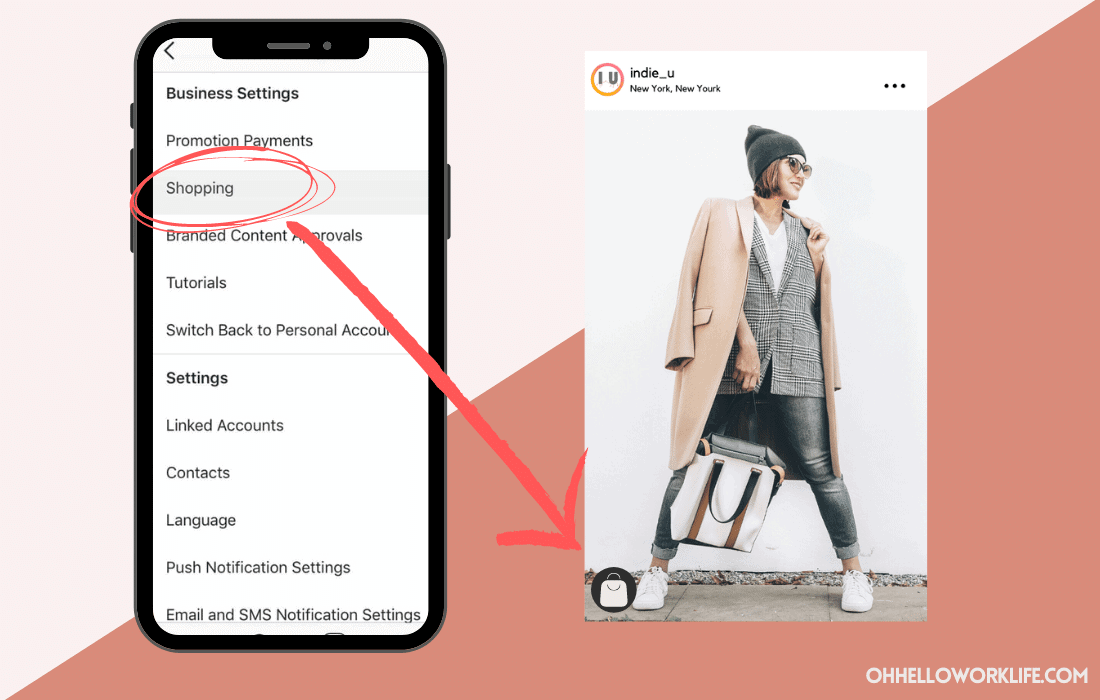
- Go to your Business Instagram Profile and tap the three horizontal bars
- Select Settings
- Shopping should be listed under settings, click to activate
- Select product catalog to pull from
Step 7: Start Tagging Products on Posts and Stories
This is the fun part! Your images will not only tell a story, but can now be tagged with a shop icon for customers to add your products to a cart for purchase!
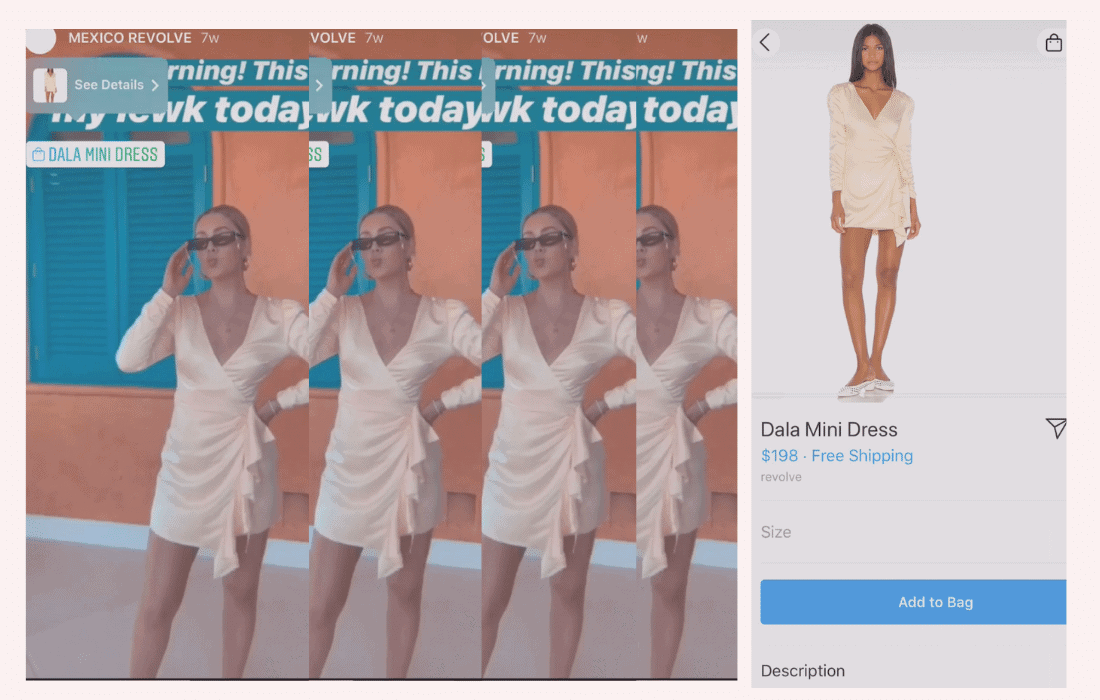
- Tagging a product in your post is exactly like tagging a friend, except there you will use the product icon button. Click on the product icon and select the style that is in the post.
- Tagging a product on your stories is simply selecting the stickers option and selecting a product sticker. Place the sticker on your story and select the style from the list of active items.
Conclusion:
Checklist to Set Up anInstagram Shop
- Facebook Business Page
- Instagram Business Account
- Facebook Business Manager Account
- Facebook Commerce Account
- If you own a website from an e-commerce platform, you need access to it
- If you have an Etsy Shop you will need access to data
- Pictures of your product
- Patience… it takes time for each step, some longer than others
I hope this step-by-step guide will motivate you to set up your Instagram Shop!
You spend so much time on those Instagram posts! It’s time to make them worth more than just “likes”, let’s make them go “ka-ching”!
Are you thinking of starting an Instagram shop? Drop a note below and share!


